BIOS Information:
The latest, Gateway 2000 supported BIOS for this motherboard is GLB05.
Make sure that your BIOS begins with GLB.
Before making any changes to your BIOS, document your settings so that when you update your BIOS, you'll have a record of the old settings.
This is very important, in the event you experience issues with the new settings.
Note: Do not copy the Command.com file if one is extracted from the BIOS file.
Memory Information
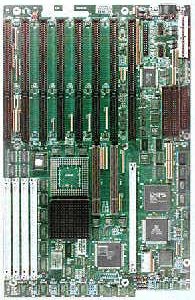
The Micronics 486DXLB motherboard can support 70ns, 72-pin, 36-bit, parity, fast page mode memory.
This memory does not have to be installed in identical pairs and instead can be installed in odd or even numbers.
The main limitation is that you must use only 4 or 16 Megabyte (MB) SIMM modules.
If you install any amount of memory over 16 MB, you must enter the BIOS setup.
To enter the BIOS setup after a clean startup, press the CTRL+ALT+ESC keys.
On the second page of the menu, disable the BIOS Shadow.
This may slow the computer down a bit.
Most noticably, the Power On Self Test (POST) beep will sound much lower and be much slower.
You can compensate for this a bit by adding X=F000-F7FF ROM=F000-F7FF to the end of your Emm386.exe line in the Config.sys file.
To do this:
From the C:\ prompt type: EDIT Config.sys.
Press ENTER.
Press the ARROW keys to locate the Emm386.exe line.
Press the ARROW keys to place the blinking cursor at the end of this line.
Then type: X=F000-F7FF ROM=F000-F7FF.
From the File menu, click Save. Then from the File menu, click Exit.
When adding memory you must also change the switch settings as on the chart below to accomodate your new memory.
| Bank # Switch Number
| Total
Memory
| Bank
0
| Bank
1
| Bank
2
| Bank
3
| SW
8-1
| SW
8-2
| SW
8-3
| SW
8-4
| | 4MB
| 4MB
| --
| --
| --
| On
| On
| On
| On
| | 8MB
| 4MB
| 4MB
| --
| --
| Off
| On
| On
| On
| | 12MB
| 4MB
| 4MB
| 4MB
| --
| On
| Off
| On
| On
| | 16MB
| 4MB
| 4MB
| 4MB
| 4MB
| Off
| Off
| On
| On
| | 16MB
| 16MB
| --
| --
| --
| On
| On
| Off
| On
| | 20MB
| 4MB
| 16MB
| --
| --
| On
| On
| Off
| Off
| | 24MB
| 4MB
| 4MB
| 16MB
| --
| On
| Off
| On
| Off
| | 28MB
| 4MB
| 4MB
| 4MB
| 16MB
| Off
| On
| On
| Off
| | 32MB
| 16MB
| 16MB
| --
| --
| Off
| On
| Off
| On
| | 36MB
| 4MB
| 16MB
| 16MB
| --
| On
| Off
| Off
| Off
| | 40MB
| 4MB
| 4MB
| 16MB
| 16MB
| Off
| Off
| On
| Off
| | 48MB
| 16MB
| 16MB
| 16MB
| --
| On
| Off
| Off
| On
| | 52MB
| 4MB
| 16MB
| 16MB
| 16MB
| Off
| Off
| Off
| Off
| | 64MB
| 16MB
| 16MB
| 16MB
| 16MB
| Off
| Off
| Off
| On
|
Processors and upgrade information
This motherboard will only accomodate a DX2 processor.
If you have a DX-25, you can use a DX2-50 OverDrive chip.
If you have a DX-33, you can use a DX2-66 OverDrive chip.
You may successfully be able to use a DX4/100 chip, which runs externally at 33 Megahertz (MHz), but You may have to upgrade your BIOS to the MicroFirmware revision in order to accomodate the extra cache on the processor.
Since the motherboard is 5.0 and the DX/4 is a 3.3 volt chip, you would have to get the chip with a built in voltage regulator to compensate for the voltage differences.
Hard disk and controller information
Either BIOS revision offered by Gateway 2000 can support up to a 528 MB IDE hard disk.
With the proper BIOS upgrade you can use a hard disk up to 2.1 Gigabyte (GB) in size.
You can purchase the proper BIOS upgrade from MicroFirmware.
Note: When hooking up the cabling to the IDE connectors, be sure to maintain pin 1 orientation.
The red speckled edge on both of the ribbon cables faces the rear of the computer.
|